Saturday, April 5, 2014

Informatica PowerCenter Data Validation Option (DVO) Part-II: Installation and Configuration

The illustration below explains the steps involved to install and configure the Informatica PowerCenter Data Validation Option for usage with Informatica PowerCenter installed on a local machine.


The OS and software versions used for this illustration are as below:
1. Microsoft Windows XP SP3 (32-bit)
2. Microsoft SQL Server 2008
3. Informatica PowerCenter 9.1.0 HotFix2
4. Informatica PowerCenter Data Validation Option 9.1.4.2


The Informatica PowerCenter Server and Clients, PowerCenter DVO Client and Microsoft SQL Server 2008 are all installed on the same machine in this illustration. If the Informatica PowerCenter Server is installed on a machine other than the local machine, install the Data Validation Option on the same machine as the Informatica PowerCenter Clients.

Note: The installation and configuration steps may differ for different versions of the DVO Client and different database types. In this illustration, Microsoft SQL Server 2008 is used as the database to create the Data Validation Option repository tables.


Prerequisite Checks
  • The machine that hosts Informatica Services must be installed and configured on the same local area network as the Data Validation Option Client machine.
  • The Informatica domain must contain at least one PowerCenter Integration Service.
  • Install PowerCenter Client on the same machine where Data Validation Option will be installed.
  • Setup at least one PowerCenter repository.

System Permissions
You require certain system permissions to complete Data Validation Option installation and configuration. To complete Data Validation Option setup, verify that you have the permission to complete the following tasks:
  • Create a database, including the ability to create schemas, tables, indexes, sequences, and views.
  • Create a PowerCenter connection object in the Workflow Manager.
  • Create a folder in a PowerCenter repository in the Repository Manager.
  • Create and associate a PowerCenter Integration Service with the PowerCenter repository that the Data Validation Option user can access. (This task can be performed by the Informatica PowerCenter Administrator).
  • Copy a JAR file onto the machine that hosts Informatica Services. (This task can be performed by the Informatica PowerCenter Administrator).
  • Configure the Administrator tool. (This task can be performed by the Informatica PowerCenter Administrator).
  • Modify the environment variables on the machine where you install Data Validation Option.
  • Read and write on the Data Validation Option installation directory and subdirectories.

The installation and configuration steps are explained below. 

STEP-1 : Creation of SQL user account for DVO repository
  • For this illustration, a new database infa_dvo is created in SQL Server along with a SQL user account "infa". The database role membership assigned for the "infa" user on the infa_dvo database is db_owner as shown below.
  • The infa_dvo database created will contain no database objects initially as shown below.


STEP-2 :  Verify if the PowerCenter Repository and Integration Services are running
  • For this illustration, the Informatica PowerCenter Repository Service PowerCenter_RS and the Integration Service PowerCenter_IS are created and running in the Informatica domain Domain_bi-7984eff67b9e.


STEP-3 : Creation of Informatica PowerCenter User
  • This step can be carried out with the help of the Informatica Administrator. The new Informatica user to be created should have privileges to create a folder in Informatica PowerCenter Repository Manager and to create a relational connection in Informatica Workflow Manager.
  • For this illustration, an Informatica user "nelrick" is created using the Informatica Administrator in the Informatica PowerCenter repository PowerCenter_RS with the below roles.

  • The privileges assigned to the Informatica user "nelrick" on selection of the above roles are shown below.


STEP-4 : Creation of folder in Informatica PowerCenter Repository Manager
  • Login to the Informatica PowerCenter repository from the PowerCenter Repository Manager tool using the Informatica login "nelrick" created in STEP-3. 
  • Create a folder DVO as shown below. This folder is needed for DVO to store the mappings, sessions and workflows that get generated while performing tests and to execute these tests. This folder is to be used specifically to store only the DVO mappings. Every DVO user must have the privileges to use this folder.

  • The user "nelrick" has permissions on the DVO folder as shown below. Grant permissions to other users if needed on the DVO folder.


STEP-5 : Creation of relational connection in Informatica Workflow Manager
  • Login to the Informatica PowerCenter repository from the PowerCenter Workflow Manager tool using the Informatica login "nelrick".
  • Create a relational connection INFA_DVO that points to the DVO repository database infa_dvo created in STEP-1 with the SQL user account "infa" as shown below. This is needed for Informatica PowerCenter Integration Service to connect to the DVO repository to store the test results in the DVO repository tables.


STEP-6 : Verify if domains.infa file is present on the machine where PowerCenter Clients are installed
  • Check if the domains.infa file is available in the following location: \clients \PowerCenterClient\.
  • If the domains.infa file is not available on the PowerCenter Client machine,
    copy the file from the following location on the PowerCenter server machine: installation directory>\

STEP-7 : Creation of environment variable on DVO Client machine
  • Create an environment variable called INFA_HOME and set the value to the location of the domains.infa file as shown below. Enter only the domains.infa file path, excluding the domains.infa filename, for the variable value as shown below. The value is C:\Informatica\9.1.0\clients\PowerCenterClient\ for this illustration.


STEP-8 : Installation of DVO on the PowerCenter Client machine
  • Start the installation of the Informatica PowerCenter DVO client. The initial setup screen us as shown below.
  • Specify the installation directory as shown below.
  • After installation completes, keep the default options checked to launch DVO as shown below.


STEP-9 : Configuration of the DVO repository in the DVO client
  • While DVO is launching, it attempts to connect to the DVO repository as shown below.
  • Since the DVO client has not been configured to connect to the DVO repository, the below message is displayed. Click OK to continue.
  • The DVO client preferences window opens. Select Data Validation Option on the left and enter the Data Validation Option Repository database details as specified in STEP-1. Click Test to verify database connectivity.
  • If connectivity is successful, the below message is displayed. Click OK to proceed.
  • The Data Validation Option Repository schema needs to be created as shown below. Click Yes to continue.
  • After the schema objects are successfully created, the below message is displayed.
  • Verify if the schema objects are successully created in the infa_dvo database as shown below.
  • Next click on the Mapping Properties on the left in the Preferences window. Keep the defaults as shown below. Click Save.
  • The Mapping Properties and Descriptions are explained below.


STEP-10 : Copy the dvoct.jar file from the DVO installation directory to the Informatica Server
  • For this illustration, the dvoct.jar file is created in the D:\Informatica9.1.0\DVO\powercenterlibs directory. This file needs to be copied to a folder in the root directory on the machine that hosts Informatica Services. This activity can be performed by the administrator of the Informatica Server if the Informatica Server is installed on a separate machine. In this illustration the dvoct.jar file is copied to the C:\Informatica\DVO folder on the local machine.

STEP-11 :  Updating the JAVA SDK Classpath for the PowerCenter Integration Service
  • This activity can be performed by the Informatica Administrator. 
  • Login to the Informatica Administrator tool. From the navigator, select the PowerCenter Integration Service PowerCenter_IS and click the Processes tab. 
  • Edit the Service Process Properties > General Properties and edit the JAVA SDK Classpath to enter the path to the dvoct.jar file on the Informatica Server as shown below. If there is a value in JAVA SDK Classpath, add a semi-colon after the classpath before the dvoct.jar file path is added.


STEP-12 :  Adding the Informatica Repository that contains the folder where DVO will create mappings, sessions and workflows for tests to be executed
  • Launch the DVO client as shown below.
  • Right-Click on INFA Repositories and select Add Repository to add the Informatica Repository PowerCenter_RS that contains the DVO folder created in STEP-4.
  • This opens up the Repository Editor window. Enter the details as shown below. If the Security Domain is Native, it can be left blank.
  • Click Test. If all the details entered in the Repository Editor window are correct, the below message will be displayed.
  • If another Informatica Repository is to be added later, ensure that the Contains Target Folder is set to false because only one repository can have a target folder. In this illustration, the target folder is DVO created in the PowerCenter_RS repository.
  • The below message is displayed after the PowerCenter_DVO repository is added. Click OK to refresh the folders and connections in the PowerCenter_RS Informatica PowerCenter repository.
  •  After the refresh is complete, the below message is displayed.
  • The folders in the PowerCenter_RS Informatica PowerCenter repository will be displayed under the PowerCenter_DVO repository in the DVO client as shown below.

The DVO client is setup for testing and validating data loaded by mappings created in the PowerCenter_RS repository.

References
  • Informatica PowerCenter Data Validation Option (Version 9.1.2.0) Installation and User Guide

Saturday, March 29, 2014

Informatica PowerCenter Data Validation Option (DVO) Part-I: Introduction


The DataValidator for PowerCenter product was originally developed by a company DVO SOFTWARE. It is now available under the Informatica brand as Informatica PowerCenter Data Validation Option.

DVO is a custom tool built on top of Informatica PowerCenter. DVO integrates with the Informatica PowerCenter Repository and Integration Services and enables developers and business analysts to create rules to test the data being transformed during the data integration process.


DVO Architecture
 Courtesy: Informatica Corp.
  • Data Validation Option requires installation and setup of PowerCenter. 
  • Source and target data table and file definitions are imported from PowerCenter repositories.  
  • You set up table pairs and test rules in Data Validation Option. This test metadata is stored in the Data Validation Option repository.
  • When the tests are run, DVO communicates with PowerCenter through an API to create appropriate mappings, sessions, and workflows, and to execute them.
  • PowerCenter connects to the data being tested instead of Data Validation Option.
  • After the tests are executed, results are stored in the Data Validation Option repository and displayed in the DVO Client.

Typical Data Validation Workflow
  • Data Validation Option reads one or more PowerCenter metadata repositories.
  • You define the validation rules in Data Validation Option.
  • You run the rules to ensure the data conforms to the validation rules. When you do this, Data Validation Option performs the following tasks:
          - Creates and executes all tests through PowerCenter.
          - Loads results into the DVO results database and displays them in the DVO Client.
  • You examine the results and identify sources of inconsistencies in the ETL process or the source systems.
  • You repeat this process for new records.

Benefits of DVO
  • DVO reduces the time required for data validation and production data auditing and verification significantly, eliminating the traditional methods of validating data by visual inspection, data comparison tools or writing SQL scripts viz row counts, minus queries etc. The risk of validating data by traditional methods is particularly high when there is a larger data set to work with and a higher chance of occurence of human errors.
  • Maintaining different test scripts to validate data for different projects is cumbersome. DVO provides a easy-to-use GUI interface to test the rules created for data validations for multiple projects. 
  • No programming skills needed to create validation tests.
  • DVO includes a repository with reporting capabilities to provide a complete audit trail of all tests and their results.
  • It reads data definitions from PowerCenter metadata repositories and can easily deal with data definition changes.

Key Pointers For DVO Testing
  • DVO tests data only, not mappings or workflows. Testing mappings is unit testing, which is different from data validation.
  • DVO only reads table definitions from PowerCenter metadata repositories, and checks the data at either end of the process and will show problems or inconsistencies only. It does not attempt to identify the bug in the ETL process.
  • Do not copy formulas from the ETL mapping into Data Validation Option. If there is an error in the ETL mapping formula, you will replicate it in Data Validation Option, and Data Validation Option will not catch it. Therefore, you must always maintain a proper separation between ETL and testing.
  • Do not try to do everything in Data Validation Option. If you think that a particular step can be accomplished more easily with SQL, use SQL. If you run 95% of your validation in Data Validation Option, and can document it with the audit trail, this is more than enough.

 DVO Usage
  • Validate Data being Transformed - ETL Testing, ETL Reconciliation, Application Migration


Courtesy: Informatica Corp.


  • Validate if Data is Identical - ETL Migration, Database Migration, ETL Version Upgrade

                                                 Courtesy: Informatica Corp.

References
  • www.informatica.com
  • Informatica PowerCenter Data Validation Option (Version 9.1.2.0) Installation and User Guide

Sunday, July 7, 2013

Configuring Mail Services for Informatica PowerCenter

The illustration below explains the steps involved to install and configure email services for Informatica PowerCenter installed on a local machine. This is a step-by-step guide to send emails from Informatica PowerCenter email task or a command task using Cygwin.


The OS and software versions used for this illustration are as below:
1. Microsoft Windows XP SP3 (32-bit)
2. Microsoft Outlook 2007
3. Informatica PowerCenter 9.1.0 HotFix2
4. Cygwin Version 1.7.17
5. hMailServer Version 5.3.1-B1748


hMailServer is a free e-mail server for Microsoft Windows. It supports the common e-mail protocols (IMAP, SMTP and POP3) and can easily be integrated with many existing web mail systems. It has flexible score-based spam protection and can attach to your virus scanner to scan all incoming and outgoing email. This is a good option to use for configuring email services in absence of a Microsoft Exchange Server.


The Informatica PowerCenter Server and Clients, the mail server hMailServerCygwin and Microsoft Outlook are all installed on the same machine in this illustration. If the Informatica PowerCenter Server is installed on a machine other than the local machine, install hMailServer and Cygwin on the Informatica PowerCenter Server.


Before downloading, please verify if the software version is compatible with your Windows OS. The download links for hMailServer and Cygwin are below.
2. Cygwin


The installation and configuration steps shown below may differ for different versions of hMailServer and Windows OS.


Step 1 - Prerequisite Checks


  • Microsoft Outlook should be setup as the default email client on Windows in order for Informatica PowerCenter Email task to send emails. This can be setup from Start > Control Panel > Internet Options > Programs. Ensure that Microsoft Office Outlook is selected as the default email program on the Informatica PowerCenter Server as shown below.


  • Verify that the Informatica PowerCenter service is running without any issues and both the Repository and Integration services are up.
  • Port 25 is the default port used to transport or communicate email across the Internet using the SMTP protocol. Ensure that this port is not blocked or used by any other process on the Informatica PowerCenter Server. To check, if a port is in use on a Windows based system, the below command can be run in the command prompt.  
               netstat -ano
        -a: Displays all active connections and the TCP and UDP ports on which the computer is 
                   listening.
        -n: Displays active TCP connections, however, addresses and port numbers are expressed
                   numerically   and no attempt is made to determine names.
              -o: Displays active TCP connections and includes the process ID (PID) for each connection.

       If the hMailServer is already installed, the port 25 would be in use as shown below.


      The process that is using Port 25 is having a PID: 1200. The process can be found out in the
      Windows Task Manager as shown below.


  •  For using Cygwin, ensure that it is correctly installed on the Informatica server. Also, add the Cygwin bin path followed by a semicolon to the beginning of the Variable Value of the Path system variable in the Environment Variables. For instance, if Cygwin is installed on C drive, add the following path as explained above - C:\cygwin\bin;. This is needed to execute unix based commands from an Informatica command task through Cygwin. 


       Step 2 - Installing the hMailServer


  • Start the installation for hMailServer. Click Next to continue.


  • Accept the License Agreement as shown below. Click Next to continue.

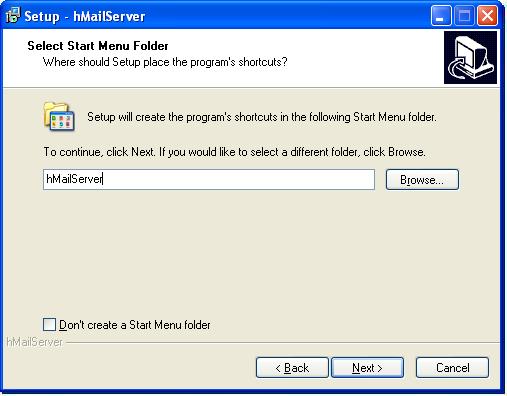
  •  Select a folder on the local drive to install hMailServer as shown below. Click Next.


  • Select both the components to install as shown below. Click Next.

  • Use built-in database engine (Microsoft SQL Compact) as the default database server type. Click Next


  • Click Next to continue on the screen below.


  • Setup is ready to start installation in the destination folder. Click Install.


  • At the hMailServer Security screen, specify a password for hMailServer Administrator as shown below.


  • After the installation completes, ensure that the hMailServer service is started as shown below in Services.


Step 3 - Configuring the hMailServer


  • The configurations shown below in hMailServer Administrator are only those that are needed to send emails from Informatica PowerCenter.
  • After the setup completes, run the hMailServer Administrator as shown below.

  • Enter the password for hMailServer Administrator that was specified in the hMailServer Security screen as shown below.


  • The hMailServer Administrator initial screen is shown below.

  • Click on Domains on the left and click Add as shown below to add a domain.


  • Specify the domain name below the Domain text box. For this illustration, the domain name is "dataintegration.com". Click Save to register the domain in the hMailServer as shown below.


  • Next step is to add accounts to the hMailServer. For this illustration, we will create two accounts - "informatica" & "nelrick". The "informatica" account will be used by Informatica PowerCenter to send out emails. The "nelrick" account will be used to receive emails.
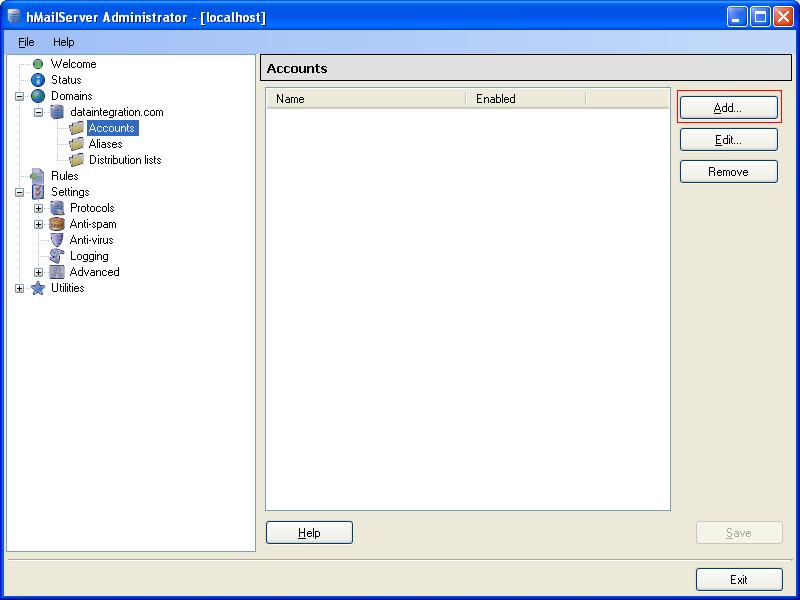
  • Click on Accounts on the left. Click Add as shown below to add a new account.


  • Enter "informatica" in the Address text box and specify a password as shown below. The password will be encrypted. Click Save to add the account.


  • Similarly, create a new account for "nelrick" as shown below.


  • In the tree view to the left, go to Settings > Protocols > SMTP. To the right, click on the Delivery of e-mail tab and specify the Local host name as shown below. For this illustration, this value is "localhost", else we can specify the computer name of the Informatica PowerCenter Server. Click Save.


  • Go to Run. Type services.msc to open Services. Restart the hMailServer service. This is needed to reflect the new configurations done to the hMailServer.


Step 4 - Configuring the Microsoft Outlook client to receive emails

  • Open Microsoft Outlook. Go to Tools > Account Settings.


  • Under the Email tab, click New to add an account to receive emails.

  • In the Add New E-mail Account screen as shown below, specify the account Name, E-mail Address and Password for "nelrick" while creating the "nelrick" account in the hMailServer.


  • Select the Manually configure server settings or additional server types check box and click Next to continue.


  • Select Internet E-mail radio button as shown below to connect to the hMailServer. Click Next.


  • In the Internet E-mail Settings, specify the Local host name added in the  Delivery of e-mail tab in hMailServer Administrator as the Incoming mail server and Outgoing mail server (SMTP) as shown below. The password in Logon Information will be the same as specified while creating the "nelrick" account in hMailServer. If the hMailServer is installed on a different server, we need to specify the computer name of that server in the Incoming mail server and Outgoing mail server (SMTP) text box.


  • Click Test Account Settings as shown above. The status should be Completed as shown below for both the tasks. This indicates that the "nelrick" account is configured to receive emails from the hMailServer.


  • Click Finish.


Step 5 - Configuring the Informatica Integration Service to send emails


  • Login to Informatica Administrator.


  • The below custom properties need to be added to the Integration Service to configure SMTP for use with Informatica PowerCenter email tasks.
Property name
Property value
SMTPServerAddress
SMTP Server name or IP address
SMTPPortNumber
SMTP server port (Default is 25)
SMTPFromAddress
From Email address for the emails.The email address should be available on the SMTP server.
SMTPServerTimeout
Optional - Integer representing seconds. Default is 20 seconds.


  • Click on the Integration Service (PowerCenter_IS is the Integration Service for this illustration) on the left. On the right, click on the Properties tab. Go to Custom Properties and click Edit as shown below to add new custom properties.


  • Click New to add the below Custom Properties.


  • Similarly, add all the other Custom Properties as shown below.

  • Click OK to close the Custom Properties window. Restart the Integration Service by clicking on Recycle Service as shown below.

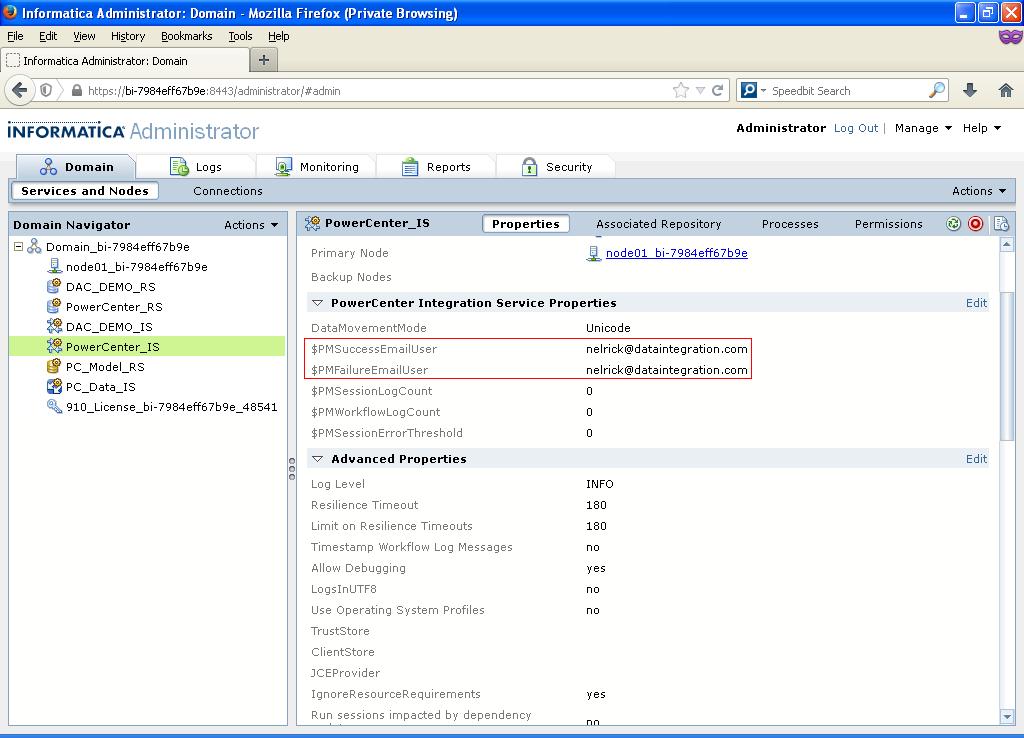
  • The $PMSuccessEmailUser and $PMFailureEmailUser can be specified in the PowerCenter Integration Service Properties as shown below. These variables can directly be used in the email task instead of specifying the e-mail address of the recipient in the Email User Name Property value.


Step 5 - Creating an email task in Informatica Workflow Manager

  • Create a workflow with an email task as shown below.
  • In the email task, specify the Properties as shown below.

  • Start the workflow. If the email task succeeds, an email will be received in user nelrick's account as shown below.


Step 6 - Configuring email properties in Cygwin email configuration file

  • Cygwin is a Unix-like environment and command-line interface for Microsoft Windows. Cygwin provides native integration of Windows-based applications, data, and other system resources with applications, software tools, and data of the Unix-like environment. Thus it is possible to launch Windows applications from the Cygwin environment, as well as to use Cygwin tools and applications within the Windows operating context.
  • For Cygwin to send emails, a new account "cygwin" is created in the hMailServer as shown below.

  • Assuming that Cygwin is already installed on the Informatica PowerCenter Server, launch a Cygwin Terminal session and type email-config. Enter the sender's email name as "cygwin" as shown below.

  • Next, enter the email address of the account created for "cygwin" in hMailServer Administrator as shown below.

  • Next, enter the recipient's email address (i.e. nelrick@dataintegration.com) as shown below.

  • Next, type 2 to use the SMTP server as shown below.

  • Next, enter the address of the SMTP server. If the SMTP server is same as the local machine, specify 127.0.0.1 as the IP as shown below else specify the correct IP address of the machine where the hMailServer is installed.

  • Next, enter the SMTP port number i.e. 25 as shown below.

  • Select 1 for SMTP authentication as shown below.

  • Select "false" to Use TLS as shown below.

  • Type Enter. The below message is displayed.

  • Verify if the data in the Cygwin email configuration is updated correctly with the values set above. The email.conf file is located in the ..\cygwin\etc\email folder. The contents of the email.conf file are shown below.

  • Send a test email from Cygwin by typing the below command as shown. If nelrick's account receives an email from cygwin email user, the configuration is completed correctly.


Step 7 - Creating a command task in Informatica Workflow Manager to send email

  • Create a workflow with a command task as shown below.
  • In the command task, use the below command to send a test email.

  • Start the workflow. If the command task succeeds, we should get an email as below.